
Your workspace
Your first watch, step by step
A short path from a new workspace to a useful monitoring setup.
Reviewed
Set the essentials first
The screenshot uses fictional sample data. Your plan, saved settings and permissions may change which controls are available.
- Open Monitors and choose Add monitor.
- Give the monitor a recognizable name and enter its public HTTP or HTTPS URL.
- Choose an interval allowed by your plan. This sample uses 180 seconds.
- Review any response rules you need, then save. Wait for a real check before judging the status.
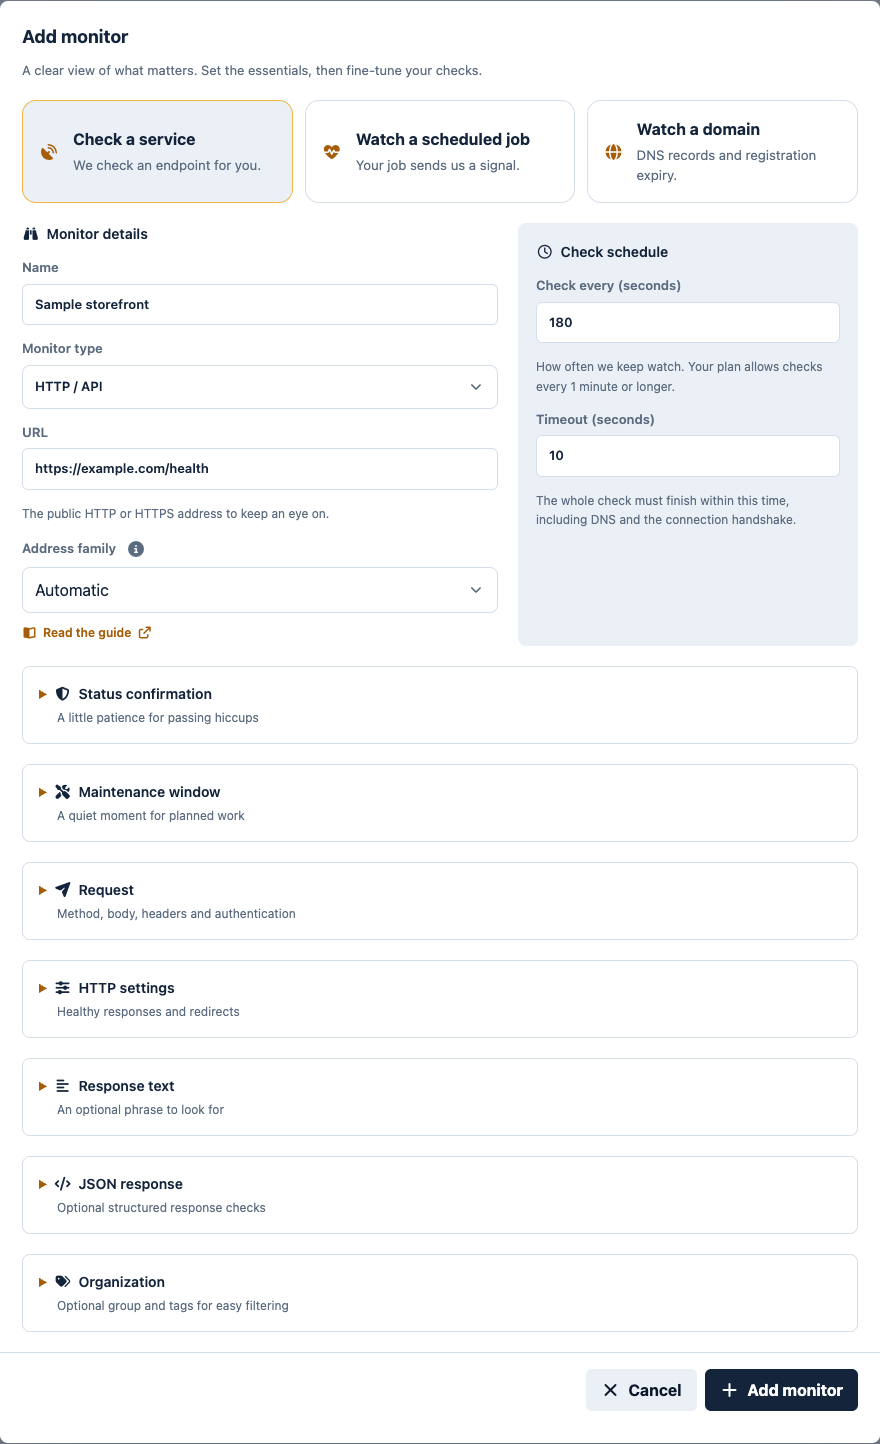
Start with one clear target
- Open Monitors and add a public HTTP or HTTPS endpoint.
- Use a recognizable name and an interval allowed by your plan.
- Review the expected HTTP codes and save.
- Run a check and open the preview drawer to inspect the result.
Add detail only when you need it
Once the basic response is correct, add a keyword or JSON assertion if HTTP status alone is not enough. If the endpoint requires credentials, use protected request details and HTTPS.
Choose where to hear about changes
Configure Slack or Teams in Account → Notifications, or email on an eligible paid plan. Send an explicit test to verify the connection. Use a widget only for information you intend to publish publicly.