
Status pages & widgets
Give your widget a clear identity
Upload a logo and choose readable brand colors.
Reviewed
Make the public window feel familiar
The screenshot uses fictional sample data. Your plan, saved settings and permissions may change which controls are available.
- Open Widgets and edit the widget you want to personalize.
- Expand Make it your own. Choose the language before editing the heading or subheading.
- Upload a supported logo if needed, then choose readable colors.
- Preview changes, save the widget and check your existing embed. Draft changes are not published until saved.
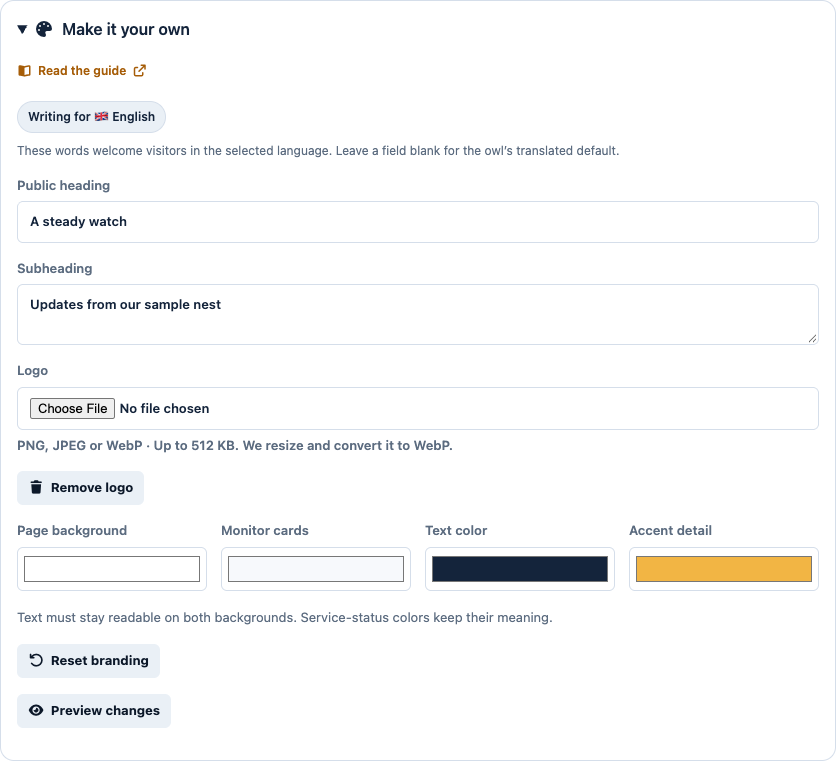
Start with Make it your own
Edit the widget and expand Make it your own. Use the logo upload control and inspect the small saved-logo preview. Uploaded logos are converted to WebP to reduce file size.
Keep status easy to read
Choose the page background, monitor-card background, text and accent colors. Colors use six-digit hex values. Text must have at least 4.5:1 contrast against both backgrounds. Service-status colors remain fixed so health signals stay recognizable.
Preview before saving
Use Preview after saving to inspect the public result. Reset branding restores defaults in the form; save to apply the reset or cancel to leave the saved widget unchanged. Avoid relying only on color to explain a custom heading or message.